Nothing feels quite as exciting as bringing home a “new-to-you” aquarium—until you open the lid and are greeted by a crusty white film, a whiff of stale water, and the nagging question: “What exactly lived in here last?” Whether you scored a free 55-gallon on Craigslist or inherited a dusty desktop tank from a neighbor, the difference between a thriving aquatic showcase and a chronic algae nightmare is how thoroughly you clean and sterilize the setup before a single new fish ever sets a fin inside. Below, you’ll find the most up-to-date, science-backed protocol for 2025—no harsh shortcuts, no risky hacks, just a meticulous, fool-proof road map that turns a questionable used tank into a biologically blank slate.
Grab your rubber gloves and a toothbrush you’ll never use on your teeth again; we’re about to dive deep into every seam, tube, and impeller.
Top 10 Cleaning A Used Aquarium
Detailed Product Reviews
1. 11.4IN. Fish Tank Cleaner. Clean up The Debris in The Fish Tank. This Cleaner is Labeled 50ml. Aquarium Water Exchanger is a Siphon Used for Cleaning Fish Tanks, Aquarium Waste Remover, Blue

Overview:
This 11.4-inch blue siphon is a budget-friendly, hand-powered vacuum designed for nano and desktop tanks. It suctions fish waste and debris through a narrow straw while optional graduated marks let you measure water removed in 10 ml increments up to 50 ml.
What Makes It Stand Out:
The built-in measuring scale is unique at this price—handy for precise water changes in shrimp or betta bowls. Its short length and soft rubber nozzle fit tight corners without disturbing aquascapes.
Value for Money:
At $8.99 you’re paying for simplicity, not bells and whistles. Comparable siphons cost the same but lack the printed volume guide, so the extra convenience justifies the tag.
👍 Pros
- Zero moving parts to break
- Fish-safe ABS
- Volume markings
- Easy to rinse clean.
👎 Cons
- Only reaches 11 in—useless for tanks taller than 9 in; requires manual suction priming that can spill water; 50 ml capacity means many refills on anything over 3 gal
Bottom Line:
Perfect for pico or quarantine tanks where you need to swap 5–10 % water quickly and measure dosage accurately. Skip it if you own anything deeper than a shoebox.
2. AQUANEAT Aquarium Cleaning Tools, Fish Tank Cleaner Kit with Adjustable Long Handle, 5 in 1 Set Including Fish Net, Algae Scraper

Overview:
AQUANEAT’s 5-in-1 kit bundles a telescopic pole (extends to 32.5 in) with four interchangeable heads—net, metal scraper, gravel rake, and flat sponge—letting you skim, scrub, and vacuum without wetting your hands.
What Makes It Stand Out:
One handle, four tools: you can net a sick fish, scrape coraline algae, rake detritus from substrate, and wipe glass in a single session. Stainless scraper blade is a rarity under $10.
Value for Money:
Eight ninety-eight for four stainless attachments and a twist-lock pole is cheaper than buying each tool separately at pet-store prices.
👍 Pros
- Quick-change heads
- Long reach for 20–55 gal tanks
- Sturdy plastic pole
- Blade tackles tough algae.
👎 Cons
- Net mesh is coarse for fry; rake can fling gravel if used carelessly; no siphon function for water removal
Bottom Line:
An excellent starter set for freshwater hobbyists who want mechanical cleaning power without investing in electric vacuums. Just pair with a separate gravel siphon for water changes.
3. Aqueon Aquarium Algae Scraper, Fish Tank Cleaning Magnets for Glass/Acrylic, Small, Black
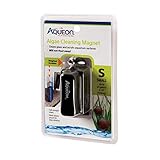
Overview:
Aqueon’s small magnetic cleaner sandwiches a scrubbing pad inside the tank and a handle outside; dragging the handle moves the pad, wiping algae while you stay dry.
What Makes It Stand Out:
The inner scrubber is weighted and curved, so it sinks straight down if the magnets separate—no fishing with tongs. Safe for both glass and acrylic.
Value for Money:
$12.99 sits mid-range, but the dual-surface compatibility and escape-proof design save you from buying separate glass/acrylic pads.
👍 Pros
- Retrieves itself
- Slim profile cleans curved corners
- Strong rare-earth magnets
- Won’t scratch when used correctly.
👎 Cons
- Pad wears flat on coarse silicone seams; not strong enough for thick >10 mm glass; inner piece can trap sand
- Scuff if flipped
Bottom Line:
Reliable daily swipe tool for tanks up to 30 gal. Keep sand substrate level low near glass to avoid grit scratches and it will last months.
4. AQUANEAT Fish Tank Cleaning Tools, Aquarium Double Sided Sponge Brush, Algae Scraper Cleaner with Long Handle

Overview:
AQUANEAT’s double-sided sponge brush pairs a 12.5-inch ridged handle with a 3″×2.5″ abrasive sponge head aimed at glass tanks plagued by green spot algae.
What Makes It Stand Out:
Dual textures—coarse green side for stubborn spots, softer blue for finishing wipes—on a single head, plus a hanging hole for drip storage.
Value for Money:
Under six bucks it’s the cheapest handled scraper here; replacement sponges would cost more at craft stores.
👍 Pros
- Lightweight
- Non-slip grip
- Swaps between light polish and heavy scrub quickly
- No metal to rust.
👎 Cons
- Acrylic owners beware—abrasive side will fog plastic; sponge detaches if twisted hard; handle too short for tanks >16 in deep
Bottom Line:
Glass-only owners with nano to 20 gal setups get a disposable-price scrubber that works. Keep a spare; sponges fatigue after a month of weekly use.
5. DaToo Aquarium Mini Magnetic Scrubber Scraper Small Fish Tank Cleaner Nano Glass Aquarium Cleaning Tools with Super Strong Magnet

Overview:
DaToo’s nano magnetic scrubber targets tanks ≤8 mm (5/16″) thick, packing N38 neodymium magnets rated 2,600 gauss into a palm-size 4.5″×2.1″ body.
What Makes It Stand Out:
Magnetic force is 2–3× average mini cleaners, letting one swipe remove crusty coraline; flip for non-woven pad to polish. ABS shell resists salt creep.
Value for Money:
$6.39 plus a one-year warranty beats no-name magnets that demagnetize in months.
👍 Pros
- Super-strong hold
- Dual-texture pads
- Tiny footprint reaches edges of Fluval Spec/Evo
- Salt-safe
- Permanent magnetism.
👎 Cons
- Overpowered for <4 mm glass—can pinch fingers; outer handle scratches easily on rimless braces; not for acrylic
Bottom Line:
If you run a nano reef or planted tank with 5–8 mm glass, this pocket rocket delivers pro-level scrubbing for spare-change money. Handle with care and it will outlast the tank.
6. QZQ Aquarium Gravel Cleaner [2025 Edition] Vacuum Fish Tank Vacuum Cleaner Tools for Aquarium Water Changer with Aquarium Thermometers Fish Net kit Use for Fish Tank Cleaning Gravel and Sand
![QZQ Aquarium Gravel Cleaner [2025 Edition] Vacuum Fish Tank Vacuum Cleaner Tools for Aquarium Water Changer with Aquarium Thermometers Fish Net kit Use for Fish Tank Cleaning Gravel and Sand](https://m.media-amazon.com/images/I/51S+2N20RtL._SL160_.jpg)
Overview:
The QZQ 2025 Edition is a hand-powered, 7-in-1 gravel vacuum aimed at aquarists who want one box that handles water changes, sand washing, algae scraping and debris removal without touching a power outlet.
What Makes It Stand Out:
A beefy pressure bulb starts the siphon in 4-5 squeezes and keeps it running silently; an integrated basket screen stops gravel and curious fish from traveling up the tube while still lifting mulm. The bundle throws in two extension hoses, temp strips, a net and scraper—enough to service tanks from 5-55 gal straight out of the bag.
Value for Money:
At $18.79 you’re basically paying $2 per tool; comparable electric vacs start near $40 and don’t include nets or thermometers. Consumables are zero—no filters, no batteries—so the long-term cost is nil.
Strengths and Weaknesses:
+ Silent, cordless, child-safe
+ Starts faster than mouth-prime models
+ Accessories cover every basic chore
– Hoses kink if bent sharply; hang them straight while draining
– Bulb valve needs a firm squeeze; arthritic hands may tire on 100+ gal tanks
Bottom Line:
A bang-for-buck swiss-army vac for small to medium freshwater setups; buy it, keep the hoses unkinked and you’ll cut water-change time in half.
7. hygger Small Fish Tank Cleaner, Aquarium Cleaning Tools Kit with Handle, Seaweed Scraper, Fishing Net, Sponge Brush,Wall Brush (S)

Overview:
hygger’s palm-size 4-in-1 kit is purpose-built for pico and nano tanks (≤10 gal) where standard 2 ft handles are overkill.
What Makes It Stand Out:
All tools snap onto a 7” anti-slip handle—kids can swap the right-angle sponge, seaweed scraper, wall brush or 2” net without wetting past the wrist. ABS plastic is salt-water safe and light enough for corner cleaning without sloshing.
Value for Money:
$11.99 lands four dedicated heads; buying similar heads separately usually runs $5-6 each. For shrimp bowls, betta cubes or office desktops, that’s impulse-buy territory.
Strengths and Weaknesses:
+ Feather-weight, kid-friendly
+ Dense sponge lifts diatoms in one pass
+ No metal blades—safe for acrylic
– Handle too short for tanks taller than 12”
– Scraper edge is plastic; tough coraline algae need extra passes
Bottom Line:
An essential desk-drawer set for nano-tank parents and dorm aquarists; just don’t expect it to reach the substrate of a 20 gal tall.
8. lounginglife Fish Tank Cleaner Kit, Gravel Vacuum for Aquarium, Fish Tank Aquarium Vacuum Gravel Cleaner, Aquarium Siphon with Magnetic Fish Tank Glass Cleaner, Aquarium Cleaning Tools Water Changer

Overview:
lounginglife packages its manual siphon with a rare bonus: a magnetic glass cleaner, creating a two-pronged attack on detritus and outer-wall smudges.
What Makes It Stand Out:
The core vac uses pure gravity—squeeze the priming bulb once and dirty water flows through twin 15” hoses. A flow clip lets you dial drainage speed for sand or bare-bottom tanks, while the included mag-float scours algae on glass up to 0.3” thick without reaching in.
Value for Money:
$24.99 sits mid-range, but add the $8-12 you’d spend on a separate magnet and the kit becomes the cheapest “complete grooming set” available.
Strengths and Weaknesses:
+ Magnet included—no extra purchase
+ Modular pipes fit 10-75 gal tanks
+ Silent, electricity-free
– Hose quality is PVC; can stiffen in cold rooms
– Printed manual is tiny; QR video helps more
Bottom Line:
One purchase covers substrate vaccing and exterior polishing; ideal for apartment hobbyists who need quiet, landlord-friendly maintenance.
9. Fish Tank Cleaner – Aquarium Gravel Cleaner, 530GPH/32W Electric Fish Tank Cleaning Tools, Adjustable Water Flow Fish Tank Gravel Cleaner Vacuum for Water Change Wash Sand Algae Cleaner Water Shower

Overview:
Mildhug’s 32 W electric vac targets medium-to-large tanks (30-180 gal) with a 530 GPH pump that doubles as a powerhead for circulation.
What Makes It Stand Out:
An inline, washable 4-layer sponge traps waste as small as 50 µm, then returns clean water to the tank—no buckets, no spills. The telescopic wand shrinks to 35” or extends to 47”, letting you service low turtle tubs or tall show tanks from the same unit.
Value for Money:
$53.99 undercuts Eheim and Fluval electric changers by $20+ yet adds adjustable flow and a reusable filter. Factor in saved water conditioner and towels and it pays for itself within months on big systems.
Strengths and Weaknesses:
+ Pump at tip—works in 3” of water
+ Flow dial gentle enough for shrimp tanks
+ Filter rinses clean in seconds
– Must stay above minimum line; run dry and the impeller screeches
– Power cord could be longer for 6 ft stands
Bottom Line:
If you’re done hauling buckets, this is the most affordable fully-electric Swiss-army vac on the market; just keep the water level above the safety mark.
10. Aquarium Siphon Pump Gravel Cleaner, Fish Tank Vacuum Gravels Cleaning Kit, Manual Water Changer with Air Push Button, Aquariums Sand Clean Set, Hose for Suck Manure Wash Sand

Overview:
Seaoura’s budget 3-in-1 uses dual airbags to create a brisk siphon for washing gravel, spot-scraping film and exporting fish waste without electricity.
What Makes It Stand Out:
The “press-press-go” buttons require less thumb force than single-bulb rivals, and the kit ships with snap-in extension tubes that configure four lengths (17-35”) so the same tool services a 5 gal cube or a 40 gal breeder.
Value for Money:
Listed at $17.88, frequent coupons drop it below $15—cheaper than a pizza and far less messy than mouth-priming.
Strengths and Weaknesses:
+ Dual bulbs = easier prime for seniors
+ Includes hose holder—hands-free drain
+ Filter basket keeps fry safe
– Outlet hose is 0.5” ID; large debris can clog
– No check valve; lift the wand too high and you lose prime
Bottom Line:
A no-frills, joint-friendly vac for starters and budget keepers; pair it with a bucket and you’re set for silent, cordless maintenance.
1. Initial Safety & Workspace Prep
Before you touch a single pane of glass, create a controlled workspace. Lay a thick towel or yoga mat on the floor to prevent accidental scratches or stress fractures. Disconnect any electronics still attached to the tank, cut off the power at the breaker if cords look frayed, and open a window—many cleaning agents and decaying biofilms release pungent ammonia or sulfur compounds. Keep a bucket of plain tap water nearby solely for emergency eye or skin rinses; bleach and vinegar splashes happen faster than you think.
2. Inspecting Silicone Seals & Structural Integrity
Old tanks often fail at the seams. Look for “bubbles” or pinholes in the silicone, areas where the bead has pulled away from the glass, or any translucent, grayish silicone—an indicator of advanced degradation. Flex the frame gently (empty tanks only); creaking sounds can mean the internal brace is cracked. If you spot minimal damage, you can reseal selectively after cleaning, but widespread rot means full strip-down and re-beading. Don’t skip this; water damage is exponentially more expensive than a tube of aquarium-safe silicone.
3. Removing Old Substrate & Debris Safely
Scoop out gravel, sand, or that neon-blue “gem” substrate with a dustpan and gloved hands—never tip the tank upside-down while it’s full. Old substrate compacts into anaerobic pockets packed with hydrogen sulfide; disturbing it releases noxious gas. Transport it outdoors in sealed buckets and spread it on flowerbeds if you’re eco-minded, or trash it if it smells like rotten eggs. A plastic dustpan with a flexible front edge prevents scratching the glass bottom while you scrape up the last stubborn grains.
4. Choosing the Right Cleaning Agents (2025 Standards)
In 2025, aquarists lean on a short list of proven, residue-free agents: unscented household bleach (3–6 % sodium hypochlorite), food-grade 5 % white vinegar, and hydrogen peroxide (3 % pharmacy grade). Avoid scented cleaners, quaternary ammonium “wipes,” and so-called “natural” citrus sprays; limonene oils cling to silicone and will haunt your pH for months. When in doubt, the motto is: “If you can’t drink it, don’t dunk your tank in it.”
5. Bleach Bath Protocol for Disinfection
Mix a 1:19 solution (one part bleach to nineteen parts water) in a dedicated container large enough to submerge ornaments and plastic plants. Fill the tank itself only if you suspect pervasive pathogens like fish tuberculosis or trematodes. A 20-minute soak at this dilution kills bacteria, viruses, and most algae spores without etching glass. Keep the workspace under 80 °F; heat accelerates chlorine off-gassing and can warp plastic rims. After the soak, sniff-test—if you still smell chlorine, you’re not done rinsing.
6. Vinegar Descale for Hard-Water Stains
White crust at the waterline is primarily calcium carbonate. Lay paper towels soaked in hot vinegar along the stain line and let them “steam” for 30 minutes. The mild acid dissolves the minerals without risking silicone damage. A plastic razor blade helps lift the final haze—always angle the blade at 30 °° to the glass to avoid gouging. For acrylic tanks, stick to plastic scrapers only; metal will scratch irreparably.
7. Filter & Pump Sterilization Techniques
Disassemble the entire filter stack: impeller, magnetic shaft, sponge, bio-balls—everything. Swirl impellers in a 1:10 bleach dip for 10 minutes, then transfer immediately to a bowl of dechlorinated water plus a triple dose of commercial conditioner. Silicon lubricant (100 % silicone, no petroleum) on the magnetic spindle prolongs life and prevents rattles. Replace any o-rings that feel brittle; a five-cent band saves you from a midnight leak.
8. Heater & Thermostat Calibration Check
Used heaters often display incorrect temps after years of mineral buildup. Submerge the heater in a bucket of 77 °F water verified by a calibrated lab thermometer. Power it for one hour, then check the shut-off point; anything ±2 °F is acceptable, beyond that, replace. Wipe the glass sleeve with a vinegar-soaked cotton swab to remove calcium jackets that insulate the heating element and cause overheating.
9. Glass vs. Acrylic: Scratch-Prevention Tactics
Glass tolerates razor blades; acrylic demands microfiber and plastic. Dust both types with compressed air first—grit is what scratches, not the scraper itself. Work in vertical strokes so any faint marks align with water level and become virtually invisible once filled. For acrylic “haze,” a dab of non-abrasive car headlight polish on a soft cotton pad restores optical clarity, but rinse obsessively afterward; residues cloud water.
10. Rinsing & Neutralizing Chemical Residues
Once disinfection is complete, drain the tank and refill with tap water plus five times the standard dose of dechlorinator containing sodium thiosulfate. Let it sit 15 minutes, drain again, and repeat until chlorine odor is absent. A cost-effective verification method is a $7 total-chlorine test strip—if it reads zero, you’re safe. Skip the “air-dry for 24 h” myth; chlorine evaporates, but chloramine does not, and many municipal supplies now use chloramine.
11. Re-Sealing: When & How to Apply New Silicone
If you spotted lifted beads during inspection, cut away the old silicone with a razor blade down to the glass seam—never atop the old layer; new silicone won’t adhere. Mask each side with painter’s tape for a crisp line, run a smooth ¼-inch bead, and tool it with a gloved finger dipped in dish soap. Cure seven full days at 60–80 °F with low humidity. Speed-curing with hair-dryers traps acetic acid vapors, leading to perpetual vinegar smells and pH crashes.
12. Reassembly & Leak-Testing
Reinstall all bulkheads, overflow boxes, and return lines hand-tight plus an extra quarter-turn—over-torquing cracks bulkhead nuts. Fill the tank 25 % on a flat, foam-supported stand and let it sit 12 hours, then 50 %, 75 %, and finally to the brim. At each stage, inspect seams for weeping. A towel under the tank reveals leaks instantly by darkening. If all remains dry for 48 h at full volume, you’re structurally sound.
13. Cycling the Tank After Deep Cleaning
Sterilization wipes out beneficial bacteria, so you must re-establish the nitrogen cycle. Add a concentrated nitrifying bacteria blend and an ammonia source (fish food or pure ammonium chloride) to 2 ppm. Monitor daily; nitrite should spike around day 10 and fall to zero by day 21. Resist “silent cycling” claims—without a measurable nitrite phase, your tank isn’t cycled, just deodorized.
14. Common Post-Cleaning Mistakes to Avoid
- Skipping the leak test because “it held water last week.” Temperature changes and silicone aging are unpredictable.
- Using table salt as a scrub—iodine additives burn plant leaves and fish gills.
- Mixing vinegar and bleach, even unintentionally on the same sponge, produces toxic chlorine gas.
- Rushing the silicone cure—every day shaved off risks a 50-gallon living-room flood.
- Introducing new fish before zero-ammonia confirmation—“slightly elevated” is still a death sentence for many species.
15. Maintenance Schedule to Keep It Sterile Long-Term
Once stocked, adopt a 28-day deep-clean rotation: every fourth week, vacuum substrate to the glass bottom, clean impellers, and rinse mechanical media in tank water. Daily, swipe glass with a magnetic cleaner to deny algae a foothold. Log temperature, nitrate, and pH in a spreadsheet; trends predict problems before they explode. Remember: a visibly “clean” tank can still harbor elevated nitrate; the eye is a poor chemist.
Frequently Asked Questions
1. Can I use apple-cider vinegar instead of white vinegar for descaling?
It works, but the tannins can stain silicone light brown and add organic acids that lower pH unpredictably—stick to clear white vinegar.
2. How do I know if the used tank had sick fish?
Ask the seller, but assume it did. A full bleach disinfection (1:19) eradicates most pathogens; tuberculosis-like mycobacteria are the rare exception—if you’re paranoid, use a 10 % hydrogen-peroxide spray after the bleach rinse.
3. Is a 1:19 bleach solution safe for acrylic tanks?
Yes, for 20 minutes. Extended soaks cloud acrylic; limit exposure and rinse promptly.
4. Can I speed up the silicone cure with a heat lamp?
Heat lamps drive surface skin formation, trapping acetic acid and weakening the bond—room-temperature curing is non-negotiable.
5. Do I need to replace filter media after sterilization?
Mechanical sponges can survive bleach if dechlorinated thoroughly, but bio-media is cheaper to replace than risk residual chlorine.
6. How full should I fill the tank during the leak test?
To the brim—minor seams can seep only under maximum pressure. Place towels underneath to spot droplets early.
7. Can I use dish soap for initial degreasing?
Avoid it. Soap leaves phosphate residues that trigger algae blooms; vinegar cuts grease adequately without lingering films.
8. How long after resealing can I add fish?
After the seven-day silicone cure, you still need to cycle the tank (typically 21 days), so plan for a month total.
9. Will bleach hurt the plastic trim on my aquarium?
A 1:19 solution is safe for ABS and PVC trims for 20 minutes; prolonged exposure can fade colors but won’t compromise strength.
10. My tap water has chloramine—does air-drying remove it?
No. Use a chloramine-specific dechlorinator that breaks the ammonia-chlorine bond; sodium thiosulfate alone isn’t enough.